
| 일 | 월 | 화 | 수 | 목 | 금 | 토 |
|---|---|---|---|---|---|---|
| 1 | 2 | 3 | 4 | |||
| 5 | 6 | 7 | 8 | 9 | 10 | 11 |
| 12 | 13 | 14 | 15 | 16 | 17 | 18 |
| 19 | 20 | 21 | 22 | 23 | 24 | 25 |
| 26 | 27 | 28 | 29 | 30 | 31 |
- ES
- spring boot
- 그리디
- 백준
- AI
- 자바
- Elasticsearch
- JPA
- 애자일기법
- 그리디알고리즘
- API
- kotlin
- Java
- 프레임워크
- 알고리즘
- 데이터베이스
- 개발자
- 개발
- Spring
- 스프링
- 엘라스틱서치
- 클린코드
- 코딩
- database
- framework
- 코딩테스트
- 기술블로그
- 코드
- cleancode
- Baekjoon
- Today
- Total
튼튼발자 개발 성장기🏋️
#5 : bean setting 본문
bean을 설정하는 방법은 여러가지가 있다. 우리는 때때로 개발이 아닌 정보 변경을 필요로 할 때가 있다. 예를 들어서 DB 이전 혹은 서버 이전, 계정 변경 등과 같이 개발 건이 아니지만 개발자가 필요할 때가 있을 수 있다. 이러한 상황에서 굳이 개발 소스를 건드리지 않고서도 변경을 할 수 있다면 굉장히 좋을 것이다.
- Environment 객체를 사용하여 설정하는 방법
ApplicationContext에서 Environment를 가지고오는 방법.
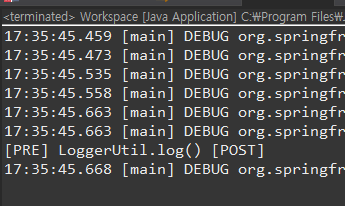
logger.PREFIX=[PRE]
logger.POSTFIX=[POST]
public static void main(String[] args) {
String config = "classpath:appContext.xml";
ConfigurableApplicationContext appContext = new GenericXmlApplicationContext(config);
ConfigurableEnvironment env = appContext.getEnvironment();
MutablePropertySources propertiesSources = env.getPropertySources();
try {
propertiesSources.addLast(new ResourcePropertySource("classpath:application.properties"));
LoggerUtil logger1 = appContext.getBean("loggerUtil", LoggerUtil.class);
logger1.setPREFIX(env.getProperty("logger.PREFIX"));
logger1.setPOSTFIX(env.getProperty("logger.POSTFIX"));
logger1.log();
} catch (Exception e) {
e.printStackTrace();
} finally {
appContext.close();
}
}
1. 사용할 properties 파일을 생성한 뒤에 변경을 요할 수 있는 정보를 작성한다.
2. Environment로 부터 propertiesSources를 가져와 해당 객체에 1번에서 생성한 properties 파일을 정의한다.
3. 자신이 정의한 정보들을 getProperty로 가져올 수 있다.
다음과 같이 같은 방법으로, 더 간소화하여 나타낼 수 있다.
public static void main(String[] args) {
	String config = "classpath:appContext.xml";
	ConfigurableApplicationContext context = new GenericXmlApplicationContext();
	GenericXmlApplicationContext appContext = null;
	ConfigurableEnvironment env = context.getEnvironment();
	MutablePropertySources propertiesSources = env.getPropertySources();

	try {
		propertiesSources.addLast(new ResourcePropertySource("classpath:application.properties"));

		appContext = (GenericXmlApplicationContext)context;
		appContext.load(config);
		appContext.refresh();
		LoggerUtil logger1 = appContext.getBean("loggerUtil", LoggerUtil.class);

		logger1.log();

	} catch (Exception e) {
		e.printStackTrace();
	} finally {
		if(null != appContext) {
			appContext.close();
		}

		if(null != context) {
			context.close();
		}
	}
}
public class LoggerUtil implements EnvironmentAware, InitializingBean {
private Environment env;
private String PREFIX;
private String POSTFIX;
//...
@Override
public void setEnvironment(Environment environment) {
System.out.println("[env 설정]");
this.env = environment;
}
@Override
public void afterPropertiesSet() throws Exception {
System.out.println("[컨테이너 설정]");
setPREFIX(env.getProperty("logger.PREFIX"));
setPOSTFIX(env.getProperty("logger.POSTFIX"));
}
}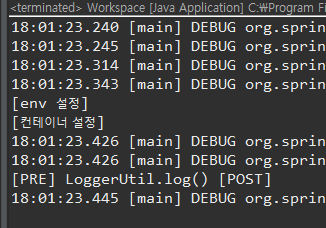
EnvironmentAware라는 인터페이스를 상속받으면 setEnvirement() 메소드를 구현하게 되어있다. 이는 Environment가 init될 때 실행되는 메소드이므로 위와같이 활용할 수 있다.
결과화면을 보면 알겠지만 Environment가 가장 먼저 설정되기 때문에 컨테이너 설정할 때는 이미 env가 init되어 있는 상태임을 알 수 있다. 그렇기 때문에 컨테이너 설정할 때 env를 활용하여 객체를 setting할 수 있다는 말이다.
- properties 파일을 직접 사용하여 설정하는 방법
1. xml 사용
public static void main(String[] args) {
	String config = "classpath:appContext3.xml";
	GenericXmlApplicationContext appContext = new GenericXmlApplicationContext();

	try {
		appContext.load(config);
		appContext.refresh();
		LoggerUtil logger1 = appContext.getBean("loggerUtil", LoggerUtil.class);

		logger1.log();

	} catch (Exception e) {
		e.printStackTrace();
	} finally {
		if(null != appContext) {
			appContext.close();
		}
	}
}
<context:property-placeholder location="classpath:application.properties" />
<bean id="loggerUtil" class="ga.dotori.util.LoggerUtil">
<property name="PREFIX" >
<value>${logger.PREFIX}</value>
</property>
<property name="POSTFIX" >
<value>${logger.POSTFIX}</value>
</property>
</bean>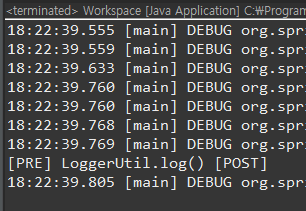
사용할 xml에서 properties에 접근이 가능하다. 그렇기 때문에 java 소스에서 따로 지정해주지 않아도 xml에서 완벽하게 동적으로 주입이 가능하다.
2. java Annotation 사용
xml 파일이 필요없는 방법으로, 개인적으로 좋아하지 않는 방법이다.
public static void main(String[] args) {
	String config = "classpath:appContext3.xml";
	AnnotationConfigApplicationContext appContext = new AnnotationConfigApplicationContext(AnnotationConfig.class);

	try {
		LoggerUtil logger1 = appContext.getBean("loggerUtil", LoggerUtil.class);
		logger1.log();

	} catch (Exception e) {
		e.printStackTrace();
	} finally {
		if(null != appContext) {
			appContext.close();
		}
	}
}
@Configuration
public class AnnotationConfig {
@Value("${logger.PREFIX}")
private String PREFIX;
@Value("${logger.POSTFIX}")
private String POSTFIX;
@Bean
public static PropertySourcesPlaceholderConfigurer Properties() {
PropertySourcesPlaceholderConfigurer config = new PropertySourcesPlaceholderConfigurer();
config.setLocation(new ClassPathResource("application.properties"));
return config;
}
@Bean
public LoggerUtil loggerUtil() {
LoggerUtil loggerUtil = new LoggerUtil();
loggerUtil.setPREFIX(PREFIX);
loggerUtil.setPOSTFIX(POSTFIX);
return loggerUtil;
}
}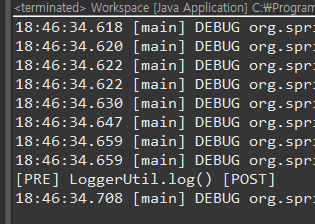
코드를 잘 보면 오직 java만을 사용하였고 어노테이션을 사용한 것을 알 수 있다. 심지어 AnnotationConfig라는 class가 필요하다. 이전에 xml이 하던 역할을 하는 class가 별도로 필요하다는 이야기다.
@value 어노테이션이 정의된 properties의 값을 가져와 설정하는 녀석이다. properties를 가져올 때는 PropertySourcesPlaceholderConfigurer()를 필수로 만들어 주고 @Bean 어노테이션을 사용해주자.
- Profile을 사용하여 설정하는 방법
proFile 속성을 사용하여 동일한 bean을 여러 개 만들어 놓고 때에 따라 적절하게 bean을 가져다 사용할 수 있는 방법이다.
1. xml 사용
public static void main(String[] args) {
	BufferedReader reader = new BufferedReader(new InputStreamReader(System.in));
	String proFile = "";
	GenericXmlApplicationContext appContext = new GenericXmlApplicationContext();

	try {
		String env = reader.readLine();
		if (env.equals("real")) {
			proFile = "real";
		} else {
			proFile = "test";
		}

		appContext.getEnvironment().setActiveProfiles(proFile);
		appContext.load("classpath:appContext_test.xml", "classpath:appContext_real.xml");
		appContext.refresh();

		LoggerUtil logger1 = appContext.getBean("loggerUtil", LoggerUtil.class);
		logger1.log();

	} catch (Exception e) {
		e.printStackTrace();
	} finally {
		if(null != appContext) {
			appContext.close();
		}
	}
}
<!-- appContext_test.xml -->
<beans xmlns="http://www.springframework.org/schema/beans"
xmlns:xsi="http://www.w3.org/2001/XMLSchema-instance"
xmlns:context="http://www.springframework.org/schema/context"
xsi:schemaLocation="http://www.springframework.org/schema/beans http://www.springframework.org/schema/beans/spring-beans.xsd
http://www.springframework.org/schema/context http://www.springframework.org/schema/context/spring-context-4.3.xsd"
profile="test">
<bean id="loggerUtil" class="ga.dotori.util.LoggerUtil" >
<property name="PREFIX" value="[TEST PRE]" />
<property name="POSTFIX" value="[TEST POST]" />
</bean>
</beans>
<!-- appContext_real.xml -->
<beans xmlns="http://www.springframework.org/schema/beans"
xmlns:xsi="http://www.w3.org/2001/XMLSchema-instance"
xmlns:context="http://www.springframework.org/schema/context"
xsi:schemaLocation="http://www.springframework.org/schema/beans http://www.springframework.org/schema/beans/spring-beans.xsd
http://www.springframework.org/schema/context http://www.springframework.org/schema/context/spring-context-4.3.xsd"
profile="real">
<bean id="loggerUtil" class="ga.dotori.util.LoggerUtil" >
<property name="PREFIX" value="[REAL PRE]" />
<property name="POSTFIX" value="[REAL POST]" />
</bean>
</beans>
협업에서 가장 조심해야할 일 중 하나가 테스트계와 상용계로 나뉘었을 때라고 생각한다. 사용계에서 테스트계 코드가 돌아가면 절대 안될테니.. 테스트코드로 실 서비스를 하면 안되지 않는가?
따라서 test 전용 bean과 real 전용 bean을 각각 만들어 사용하는 것이다.
xml파일의 beans 태그의 profile property로 설정해주기만 하면 된다. 아주 간단하다.
2. java Annotation 사용
public static void main(String[] args) {
	BufferedReader reader = new BufferedReader(new InputStreamReader(System.in));
	String proFile = "";
	AnnotationConfigApplicationContext appContext = new AnnotationConfigApplicationContext();

	try {
		String env = reader.readLine();
		if (env.equals("real")) {
			proFile = "real";
		} else {
			proFile = "test";
		}

		appContext.getEnvironment().setActiveProfiles(proFile);
		appContext.register(AnnotationConfigTest.class, AnnotationConfigReal.class);

		appContext.refresh();

		LoggerUtil logger1 = appContext.getBean("loggerUtil", LoggerUtil.class);
		logger1.log();

	} catch (Exception e) {
		e.printStackTrace();
	} finally {
		if(null != appContext) {
			appContext.close();
		}
	}
}
// Real
@Configuration
@Profile("real")
public class AnnotationConfigReal {
@Bean
public LoggerUtil loggerUtil() {
LoggerUtil loggerUtil = new LoggerUtil();
loggerUtil.setPREFIX("[REAL PRE]");
loggerUtil.setPOSTFIX("[REAL POST]");
return loggerUtil;
}
}
// test
@Configuration
@Profile("test")
public class AnnotationConfigTest {
@Bean
public LoggerUtil loggerUtil() {
LoggerUtil loggerUtil = new LoggerUtil();
loggerUtil.setPREFIX("[TEST PRE]");
loggerUtil.setPOSTFIX("[TEST POST]");
return loggerUtil;
}
}
xml과 마찬가지로 @Profile 어노테이션을 사용하여 profile 설정을 하기만하면 된다.
'Framework > spring' 카테고리의 다른 글
| #7 : MVC (Model View Controlle (0) | 2020.05.04 |
|---|---|
| #6 : AOP (Aspect Oriented Programming) (2) | 2020.05.03 |
| #4 : Bean Scope (0) | 2020.05.01 |
| #3 : Container Life Cycle (0) | 2020.05.01 |
| #2 : DI 활용 (0) | 2020.05.01 |


