Notice
Recent Posts
Recent Comments
Link
| 일 | 월 | 화 | 수 | 목 | 금 | 토 |
|---|---|---|---|---|---|---|
| 1 | 2 | 3 | 4 | 5 | 6 | 7 |
| 8 | 9 | 10 | 11 | 12 | 13 | 14 |
| 15 | 16 | 17 | 18 | 19 | 20 | 21 |
| 22 | 23 | 24 | 25 | 26 | 27 | 28 |
Tags
- 그리디알고리즘
- Spring
- 엘라스틱서치
- 코딩
- 스프링
- 코드
- 자바
- 알고리즘
- 클린코드
- 그리디
- Java
- cleancode
- framework
- Baekjoon
- spring boot
- 개발
- JPA
- 데이터베이스
- 개발자
- 프레임워크
- 읽기쉬운코드
- 애자일프로그래밍
- 애자일기법
- kotlin
- 코딩테스트
- 백준
- database
- API
- ES
- Elasticsearch
Archives
- Today
- Total
튼튼발자 개발 성장기🏋️
AWS AppSync with OpenSearch 본문
반응형
AWS에서 2018년 정식 출시한 AppSync를 사용하여 OpenSearch에서 데이터를 조회해본다.
AWS AppSync with DynamoDB 를 통해 step 4까지 선행 후에 본 포스트를 참고하는 것을 권장한다.
OpenSearch에서 데이터를 조회해야하므로 조회할 OpenSearch의 index와 조회해볼 데이터를 넣어둔다.
step 1. schema 생성
- 아래와 같이 스키마를 생성한다.
type Source { vseq: Int useripaddress: String sessioninit: Boolean } type Query { getSomeByUseripaddress(useripaddress: String!): [Source] getSomeByVseq(vseq: Int!): [Source] getAll: [Source] }- 배열의 경우에는 대괄호로 감싸준다.
step 2. 데이터 소스 생성

- 좌측에서 “데이터 소스”탭으로 진입한다.
- 우측 상단에 “데이터 원본 생성”을 클릭한다.
- 데이터 원본 이름과 유형, region, domain, IAM 권한을 선택한다.
- IAM 권한은 담당자에게 문의하여 opensearch의 조회 권한을 받는다. (필요시 다른 권한도..)
- “생성”을 클릭한다.
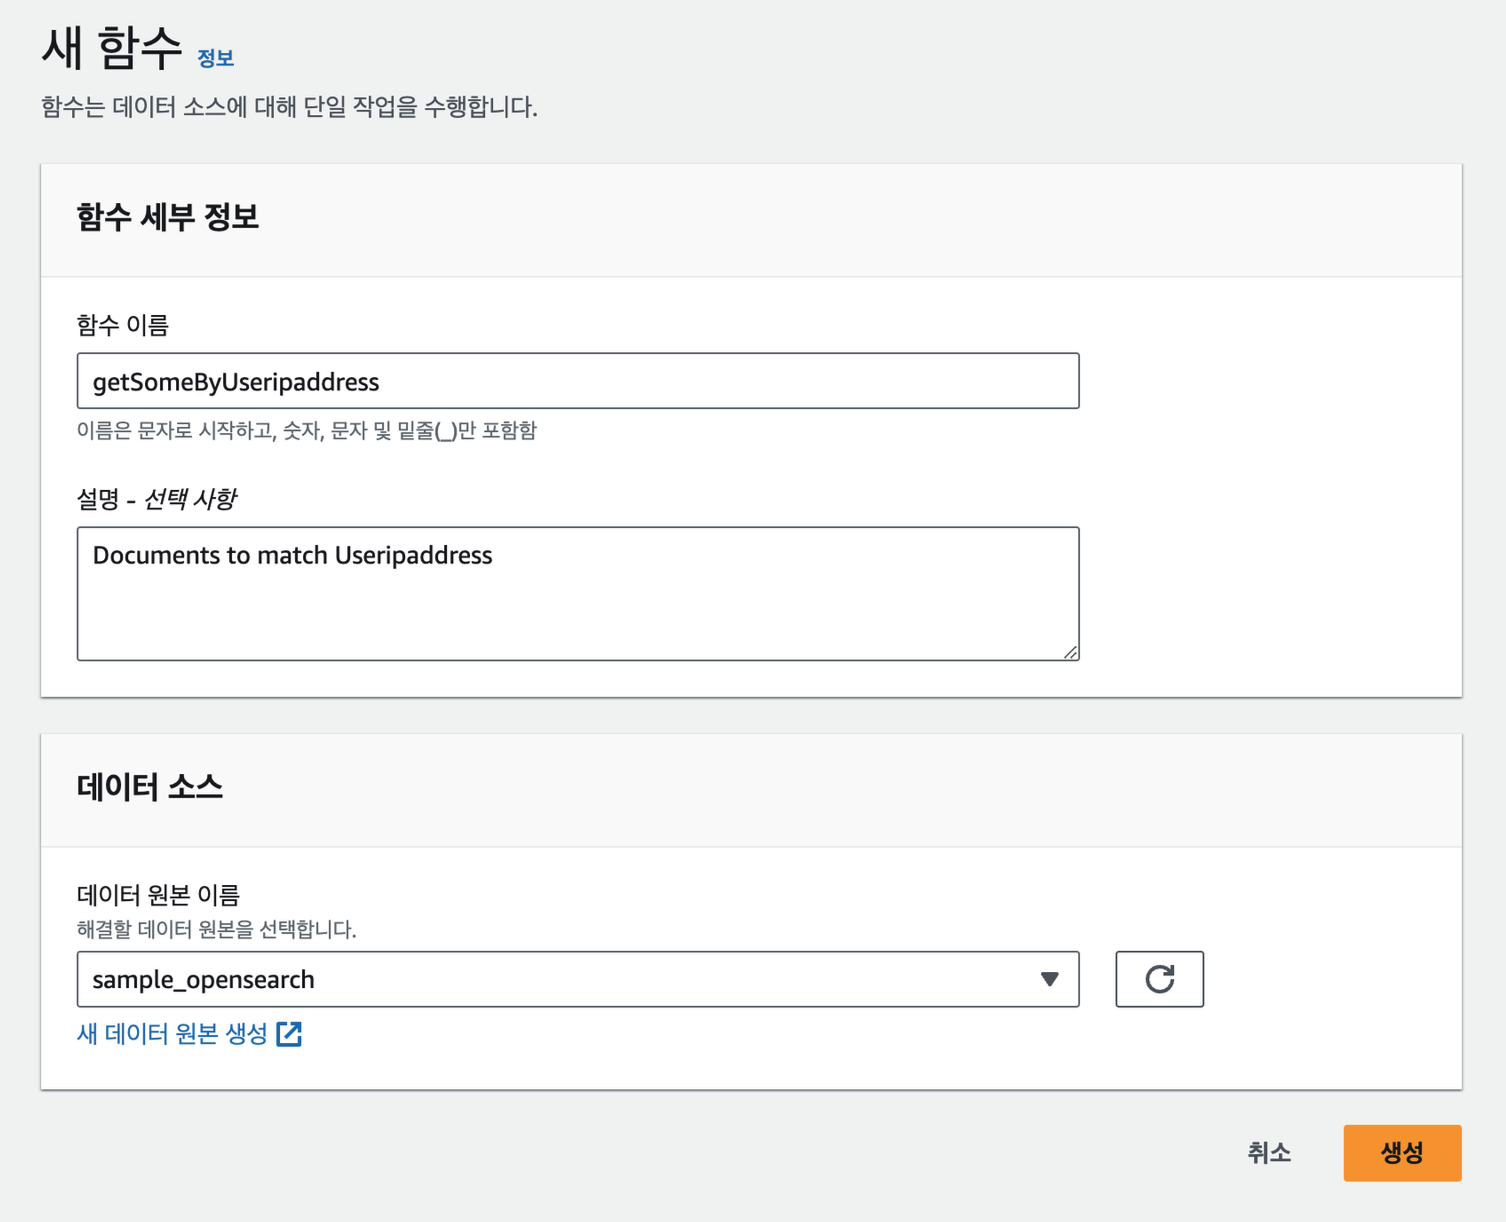
step 3. 함수 생성 (이번 예시에서는 함수를 사용해본다.)

- 좌측에서 “함수”탭으로 진입한다.
- 우측 상단에 “함수 생성”을 클릭한다.
- 함수 이름과 설명을 입력하고 step 2에서 생성한 데이터 원본인 opensearch를 선택한다.
- 함수 코드를 아래와 같이 작성한다.
import { util } from '@aws-appsync/utils' /** * Searches for documents by `author` * @param {import('@aws-appsync/utils').Context} ctx the context * @returns {*} the request */ export function request(ctx) { return { operation: 'GET', path: '/{my_index}/_search', params: { body: { from: 0, size: 50, query: { match: { useripaddress: ctx.args.useripaddress } }, }, }, } } /** * Returns the fetched items * @param {import('@aws-appsync/utils').Context} ctx the context * @returns {*} the result */ export function response(ctx) { if (ctx.error) { util.error(ctx.error.message, ctx.error.type) } return ctx.result.hits.hits.map((hit) => hit._source) }- 쿼리를 보면 알겠지만, useripaddress 값에 따른 조회를 수행한다.
- 우측 상단에 “저장”을 클릭한다.
- 같은 방법으로 아래와 같이 각 함수에 따른 코드를 작성한다.
-
import { util } from '@aws-appsync/utils' /** * Searches for documents by `author` * @param {import('@aws-appsync/utils').Context} ctx the context * @returns {*} the request */ export function request(ctx) { return { operation: 'GET', path: '/{my_index}/_search', params: { body: { from: 0, size: 50, query: { match: { vseq: ctx.args.vseq } }, }, }, } } /** * Returns the post * @param {import('@aws-appsync/utils').Context} ctx the context * @returns {*} the result */ export function response(ctx) { if (ctx.error) { util.error(ctx.error.message, ctx.error.type) } return ctx.result.hits.hits.map((hit) => hit._source) } -
import { util } from '@aws-appsync/utils';

/**
 * Gets a document by `id`
 * @param {import('@aws-appsync/utils').Context} ctx the context
 * @returns {*} the request
 */
export function request(ctx) {
    // e.g.: post
    const index = '{my_index}';
    return {
        operation: 'GET',
        path: `/${index}/_search`,
        params: { body: { from: 0, size: 50 } },
    };
}

/**
 * Returns the fetched item
 * @param {import('@aws-appsync/utils').Context} ctx the context
 * @returns {*} the result
 */
export function response(ctx) {
    if (ctx.error) {
        util.error(ctx.error.message, ctx.error.type);
    }
    return ctx.result.hits.hits.map((hit) => hit._source)
}
-
step 4. 함수 연결

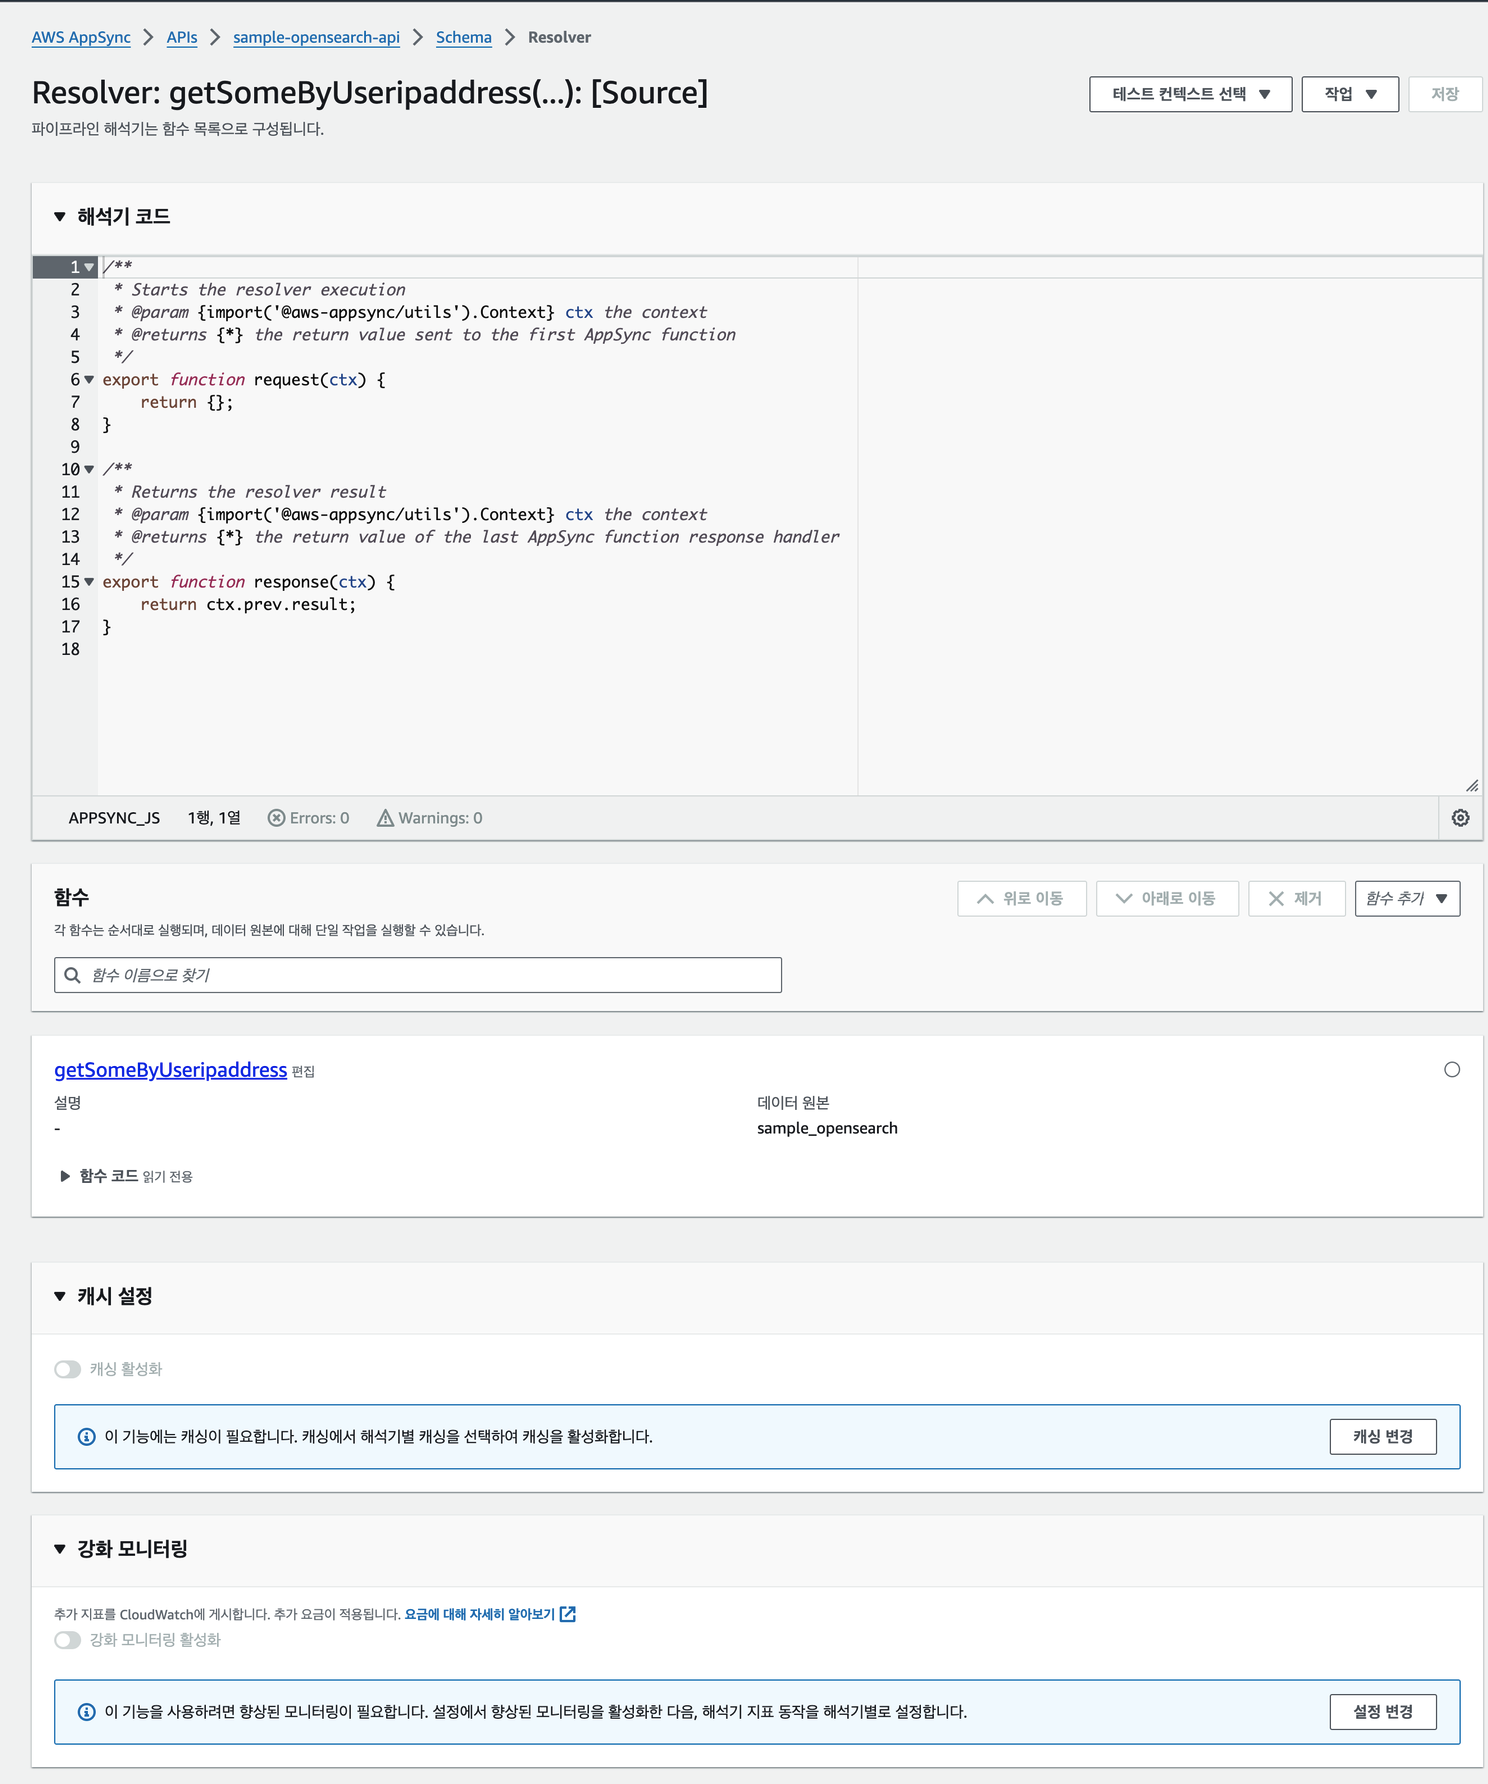
- 좌측 “스키마” 탭으로 진입한다.
- 선언해둔 각 Query에 step 3에서 생성한 함수를 연결해준다.
- 함수를 사용하기 위해 해석기 유형에서 “파이프라인 해석기”를 선택한다.
- 함수 탭에서 우측에 “함수 추가”를 클릭하여 해당 Query에 맵핑된 함수를 선택한다.
- 우측 상단에 “저장”을 클릭한다.
step 5. 쿼리 작성
- 좌측 “쿼리” 탭으로 진입한다.
- 아래와 같이 쿼리를 작성한다.
query getSomeByVseq {
  getSomeByVseq(vseq: 1) {
	vseq
	useripaddress
	sessioninit
  }
}

query getAll {
  getAll {
	vseq
	useripaddress
	sessioninit
  }
}

query getSomeByUseripaddress {
  getSomeByUseripaddress(useripaddress: "127.0.0.1") {
	vseq
	useripaddress
	sessioninit
  }
}
step 6. 쿼리 실행
- 쿼리를 실행한다.
- 실제 OpenSearch의 데이터를 조회해서 일치하는지 비교해본다.
관련 문서
반응형
'기타 > AWS Tech' 카테고리의 다른 글
| AWS MSK 벤치마킹 (0) | 2025.11.07 |
|---|---|
| AWS AppSync with DynamoDB (0) | 2024.03.22 |
| AWS AppSync 알아보기 (1) | 2024.03.18 |


